Showing posts with label tricks. Show all posts

Sunday, June 14, 2009

Ten Top Tips for Winning Photo Contests


Title: Angel Awakening
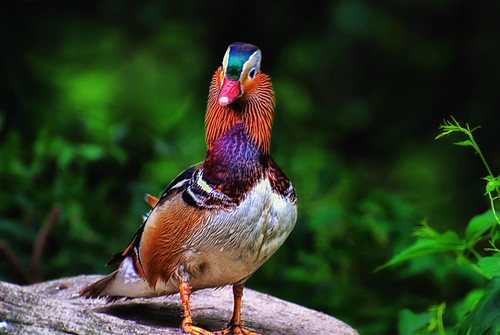
caption: If one looks closely enough, one can see angels in every piece of art. ~Adeline Cullen Ray


The above photographic montage will be entered in a contest in July. I have based my decision on this entry on the ten tips below. I am already thinking this will be a winner.

Can you win photo contests? I would think so. I have had winning entries in over 50 percent of the contests that I have entered, both locally and internationally. So are there secret keys to success? Yes, so please don't share these tips it is our secret.

This is what I do with every contest.

1. Read all the rules carefully: Be sure what you are getting yourself into. Some contest are just a sham to have your copyright. So be careful. Once you have read the rules comply. And, make sure you use the exact format the contest requires.

2. Look at the past winners: Here you can find exactly what the contest is interested in. Do you have photos of similar quality? Study the past winners for compositional elements, color, subject, and representation. Then study again. These people were not winners of a lottery. They fulfilled the expectations of the judges. And, if a contest put out by a company, or organization: How does your photo play thematically into the message or mission of the contest sponsor?

3. Look at the judges: Not always but often the judges are listed. Now, you need to search and seek out their photographs. Study their photographs carefully. Find in their photographs salient traits and style. Study carefully and you will unearth their taste. Study their bio and their writings. The more you know about who is judging you the better you will be in choosing the photograph to enter. If they write about light, composition or other photo attributes: Then these are the secret keys in unlocking their interest your submission. I would not say mimic their style, but I would say try to present what they would appreciate in a photograph.

4. Go through your photographs carefully: Set up folders of candidate photos based on you would think the judge would pick. Pick perhaps a hundred. Put all your candidates in a folder called "winners." Yes, you need to think positively. Pick out the top ten and put in another folder called "the winners."

5. Get appraisals from others: Now this is the real test. Invite some friends over for evening of photo appraisal. Go over everything you learned in researching tips two and three. Ask them to play the role of judge and show them the folder called "winners." Ask them to pick out the top ten that makes the grade. Once done, compare with your own top ten picks. How many choices were the same? Now, you should have a good idea of which photos to use in the competition.

6. Decide if you should start from scratch: Now decide if your photos really have the mustard to compete. Be honest. If the photos are not competitive you have a camera and editing tools. Armed with what you know it is time for a photo outing and get what you need.

7. Examine your selections: Put your selected photographs back into your editing program. Enlarge you photograph and check every small detail of the photograph. Decide if it can be improved. Attention to detail is an important key. You should offer the most technically correct photograph that you can. Perhaps you have learned a new technique of improvement since you last edited your photograph that you can now apply.

8. Title and caption: Taking the knowledge you have learned in tips two and three, carefully decide on a title and caption. Sometimes the decision of a title and caption for me can take longer than actually editing the photo itself. Do not take the importance of this lightly.

9. The unavoidable bell curve: Realize you are trying to push you photograph to the very best end of the bell curve. If you have followed these tips you are getting to the good end. Ninety percent of the photos submitted will be rejected quickly. You should now have a photo in the top ten percent. One little tip, is to submit early. It may be okay to submit your taxes at the last moment, but photo contests are a very different matter.

10. Be a winner: You are a winner if you followed these steps. You have improved your chances of winning the photo contest dramatically. So sit back and wait for the notification. Don't be disappointed if you lose. Look at the winner and his photos. Congratulate them in your mind. My experience is being a winner 50 percent of the time. Try again and know you are going to succeed.

Friday, April 10, 2009

Top Ten Steps: Making a YouTube Slideshow


As a photographer who wants to gain exposure, you might have overlooked the idea of placing videos on YouTube. Here are ten easy steps to make a video slide show on YouTube. Above is my best example of what works best in a slide show.

1. Download Picasa. Picasa is not only an excellent way to organize your photos, it makes making slide shows a breeze.

2. Create an album. This is easy to do, and it does not move your files from their folders. To start just select file at the top of the page then click new album and name your album.

3. Select your pictures. This is very easy. Just right click the photos and the pop up menu will have add to album. Click on the album name and instantly the photo is added to your album.

4. Know how many pictures equals the running time of your video. You can use this as a rough guide. 147 pictures will give you a running time just under ten minutes. To keep your visitors interested I would recommend a running time of no longer than five and half minutes. Just remember YouTube only allows a maximum ten minute run time. For a five minute run time I would suggest around 80 pictures.

5. Arrange your pictures. Remember that pictures can tell a story. Order your pictures in an arrangement that makes interesting transitions.

6. Let Picasa do its magic. Once your pictures are arranged just press the create a slide show. I usually stick with the standard options for this, except I find the pan and zoom transition more entertaining. Now you just have to wait for the movie to be made.

7. Get a YouTube account and upload your video. While uploading, I add in the title and description and tags etc. I set to private, until I am ready to go live. And that happens after I complete the next steps.

8. Add music. Once your video is uploaded and processed on YouTube, you can now add music. Just click the audio swap button and check the box, "Only show songs of similar length to my video." Then preview the songs that are suitable for your slide show video.

9. Go back to edit and make your video public. I wait until the audio is live.

10. Share the fun. I have set up a blog to feature my race track videos, you can also share through the variety of social network sites. And be sure to tell your friends. This is a fun way to promote your photography.

Thursday, March 26, 2009

Top Ten Camera Every Day Tricks

mandarin

Sometimes, we just think about photographing with a camera as a tool for nature,landscapes, family portraits and professional work. I thought I would share some other ways I use my camera to help myself out in life.

1. Car repairs: Or for that matter anything you take apart and put back together. I use the camera to pictures every step of the way when I take things apart. When you reassemble you have a guide and don't have to worry about which screw went where. I also use the camera to take to auto part dealers to show them the part I need especially if I do not know the name.

2. Reading the fine print: If you are getting old like me some of that small print is just hard to see. Take a picture of it and blow it up. I can't tell you how many microwave dinner directions I have read doing this when I have misplaced my glasses.

3. Finding that small object: Have you ever dropped a small screw and find it as difficult to find as a needle in a haystack? Use your camera to take pictures of the area that the item was lost sit down and blow up your photos searching is much easier this way.

4. Giving someone directions to your house: Send them an email with picture landmarks they can follow. This makes life easier for everyone.

5. Finding things in dark places: Use your camera as a third eye and utilize the flash. Under couches, and in hard places to look. It is much easier to use your camera than crouching down for a look see.

6. Telling someone how to fix the computer: You are at home talking to your friend, and they just can't get what you are trying to tell them what to do. Take a series of pictures and email them how.

7. Borrowing something from someone: Have you ever returned something and someone said it was damaged. Take some pictures of the item before you borrow or rent it, being able to show what condition the item was when you borrowed it can be your best defense.

8. Car accidents: If you unfortunately have a car accident. Be sure to take pictures. Not only might this prove your innocence it may also show that you did not do damage that could have happened later.

9. Your wallet: Take pictures of all the documents you keep in your wallet. If you ever lose your wallet you will know everything that you lost. And it could help you in canceling credit cards and replacing valuable information.

10. Documenting injuries: Sometimes bad things happen to good people. It can be important to document injuries that happened in accidents or other situations. Since injuries heal, it is good to have a photographic record.