Monday, October 11, 2010

Five Quick Tips For Better Point and Shoot Photography

Stumble It!


If you have a point and shoot camera, you can compete with those who have the fancy DSLR's. Some of my best and most profitable shots were made with the Sony H1 through H5 cameras. These cameras were particularly great for landscape shots.

The picture is of my old Sony H1 Camera with the telescope extender attached.


1. Use the timer on your camera. You will have less blurry shots - the camera moves when you press the shutter. Also, hold your breath while you shoot.

2. If you see a beautiful shot in front of you, also look behind you. You might be surprised by what you are missing.

3. Look at the lights and shadows. Having great light and shadows in your shots adds a natural feel of three dimensions.

4. Use the bracketing feature of your camera. If you take three exposures at different EV settings, you will be able to decide what is the better exposure. (EV is exposure value. EV compensation tells the camera to expose at a higher or lower setting than it thinks is right.)

5. When you compose your shot, think foreground, mid-ground, and far-ground. Look to see how the eye will be led through the picture.

Tuesday, September 28, 2010

Photographing for Dollars: Sports Photography

Stumble It!


In photography there are certain ways to assure an income. One thing to keep in mind, though - you have to be good. Event photography brings immediate results.

The selling scenario:

A simple formula to follow is if there is avid interest in an activity and you can capture things that stir people's emotional ties, those photos will sell. This is how I do this:

I go to an event such as a Natural Bridge Speedway race. I take pictures. People become curious about the guy with the camera. After the race, I send an email to the owner of the track, and tell them what I am up to. Plus I give them a link to a book I made on Blurb, and hope that they are impressed.

When I go to subsequent races, I bring the books and 8x10s, which are presented nicely in a case. I make sure that I give some photos and books to the owner of the track.


Now, I have their blessings to sell, but I still keep a low profile and let people approach me. Everything sells like hotcakes. I keep my prices low, like ten for an 8x10, and twenty for a book.

A small profit margin, but sales are repeated over and over.


This sounds simple enough, but you need to use tact, and be graceful. And be sure to thank the owner of the event for this special opportunity.

If this is all that happens, you will make some income. However, there are other possibilities.

Start thinking in a larger perspective. Could your photos be used for event promotions? And think of the countless products that could be made and sold through the event owners, or even the participants. Be creative and think out of the box, and even more income could come your way.

Now, this is a small-time operation that is run on a dime. Some people specialize in event photography and have the photos developed on the spot. Operations like this one have really capitalized on event photography.

Personally, I could not develop on the spot. Each photo takes time for me to process and I am very particular in getting the image enhanced just like I like it, but developing on the spot would definitely increase sales.

Friday, September 24, 2010

Photo Editing: The Best Programs and Filters

Stumble It!

If you are like me, photo editing is always a quest for finding the best tools. We just want each of our images to be more impressive than the one before. We strive for excellence.

And that quest can empty your pockets pretty quick. Soon you learn, though, what works best for you and find that many of those expensive filters you have bought have remained unused.

Now, I have some recommendations. These are the programs and filters that I use time and time again. And some of the recommendations might surprise you.

The article continues below:


The essential list:

Photomatix: This is the standard HDR (High Dynamic Range) program that everyone uses. It's one of the best and if used properly can really enhance the colors and details of your image.

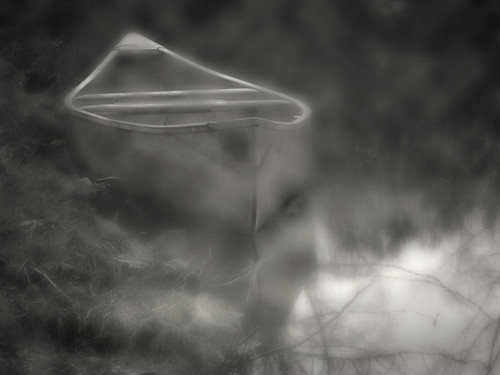
Photo Impact Pro: It's a program that is very similar to Adobe Photoshop. The advantage of this program is the cost factor. It is much cheaper than Adobe Photoshop CS3 but has many of the same functions. In some ways I prefer this program over CS3 for editing some of my images. The photo above, and this photo, were edited strictly in Photo Impact Pro and Photomatix. I like Photo Impact Pro because sometimes the edited pictures have qualities that I cannot achieve in Photoshop.

Adobe Photoshop CS3 Extended: This is the premier photo editing tool, at least until CS4 arrives. You can take a lifetime learning all the things that can be done with this fabulous program. The major cons of this program are the expense and the steep learning curve.

Filters I use most frequently:

Imagenomic: I use their pro noise reduction program. They do have a free community program that I used for awhile. The only problem I see with the community program is that it greatly reduces the size of the file you are working on.

Nik Software Color Efex Pro™ 3.0: This is a great program for making those photos pop. I love this program and all the filters that are included.

Viveza: It's also a program by Nik Software. Its ability to selectively adjust light, color, and contrast by control points is essential for the pro photographer. I use this program often.

Tiffin Dfx software: This product is sold by the same company that makes excellent filters for lenses. I highly recommend this this comprehensive suite of useful filters, and I use their filters often.

Nikon Capture
: This is a great program for editing raw pictures non-destructively. I shoot in raw, and this is the program I use to tweak my photos before editing in Adobe Photoshop or Photo Impact Pro.

Lucis Art: This product adds a very creative unique touch to your photos. It does not work with all photos, but you can get spectacular results. I would add that if you are on a budget this should be the last program that you buy.

These are the programs that I use. You do not need them all at once. I would suggest starting with Photo Impact Pro and the community version of Imagenomic, which is free. Then as you learn and develop skills, start ramping up to the next level. You will know when it is time.

Thursday, September 23, 2010

Five Cool Things about Flickr

Stumble It!


What is Flickr?

Flickr is the largest social photo sharing site in the world. Last time I checked, about six million photos are uploaded daily. They offer both free accounts and pro accounts. The cost of a pro account is 24.95 USD, which is a good investment even if you just use it as an online photo storage site. With a Pro account you have unlimited uploads in the original size of your images. You can make your photos public, private or just share them with friends. Well, that is neat, but now for the really cool stuff.

Cool stuff:

1. Flickr has third-party development with generous use of their API. This enables Flickr users to have many resources at their disposal for promoting photos. Perhaps there are thousands of configured uses. Check this out - it is all done from the Flickr API. It is one cool gallery that shows a very professional touch.

To get your free gallery, go to photofront. For a mere ten bucks more you can upgrade to a more flexible use of your gallery. And it is pretty much a lifetime subscription.

2. Another use of the API is that many companies enable you to directly access your photos for products. This greatly streamlines you time because you don't have to re-upload photos to their site.

Two of my favorites are:

Moo
I get my very unique business cards there. A pack of 50 with different pictures on each one!

Blurb
A self-publishing on-demand book store. So far, I have made three books there and the quality is top of the line.

3. The Internet presence of Flickr is huge. This in itself is a great advantage for aspiring photographers who want to be published. Just putting up your photographs and making them public brings offers for use from many necks of the Internet woods. This happens to me and it will happen to you.

4. People constantly ask me what formal training I have had in photography. Well, the truth is I have had none. What has improved my photos the most is seeing what others are doing on Flickr. Flickr has a vast network of socialization through groups, where you can learn to improve your photographs tremendously. Have you ever wanted to talk and learn techniques from the top photographers in the world? Flickr is your opportunity.

5. Do you constantly look through reviews to see what camera you will get? And do you wonder if the reviews will be unbiased? At Flickr you can see what users are doing with their cameras and quickly see the truth in the pudding.

This just scratches the surface of what Flickr has to offer. Start using it yourself and see the benefits.


Wednesday, September 22, 2010

Camera Repair: When it is in Pieces on the Ground

Stumble It!
Precision Camera Repair
Review:


Then it happens - you drop your DSLR and it is in pieces on the ground. Heartbroken, you pick up all the small parts. Is there hope?

Yes, there is. If you enter camera repair in the Google search, you will find Precision Camera comes up at the top of the list.

Last week I had the misfortune of my camera backpack opening while on my back. I heard a thump and looked down to see my D80 broken and in pieces. I carefully recovered the parts and did an online estimate for repairs.

Precision Camera quickly came up with an online estimate of 248 dollars, which included return shipping. I paid the estimate and sent the camera off along with a bag of the parts that had been spread on the ground.

I sent the camera on a Wednesday and checked the online progress. Precision received the camera Friday. It went into repairs on Monday and was headed back to me on Tuesday. By Friday, I had the camera back in my hands, in time for an important photo shoot on Saturday.

So how did Precision do, besides the very quick turnaround? Excellent. The camera was returned to factory specs, everything was recalibrated, they did a superior cleaning job both inside and out (including the sensor) and the camera software was updated.

The camera looked as good as it did when I first purchased it. Function-wise, everything was put back in exceptional order. They did a great job.

Precision Camera Repair is an authorized factory repair site for all leading brands of cameras. By the way, they even repair lenses. I truly expected a second higher estimate after they saw what bad shape my camera was in, but I never got that email and they performed the repair at the original online estimated price.

This was my second experience with Precision Camera, I had a Sony H5 that was still under warranty which they repaired, quickly and exceptionally well. Thus I had a great deal of confidence that they would repair my Nikon with the same high professional standard. I highly recommend if you break a camera or have a broken camera to give them a try.

Sunday, September 5, 2010

Foggy Wood Strange Journey

Foggy Wood available locally at the Framery
Foggy Wood has been my most well  received photo that I have ever taken.  On September 3rd of 2010 it went on display at the National Geographic Museum as one of the most beautiful found in its archives.  I was indeed humbled by the selection by National Geographic Resident Photographer, Annie Griffiths Belt.  Who is one of the most noted and outstanding photographers in the world.  It was also a pleasure to have her to select my photo for her book, 'Simply Beautiful Photographs'.

The photo has had a strange Journey.  It had previously been in the March 2008 edition of National Geographic.  and has won second place in the National Parks Foundation Share the Experience Contest.  Foggy Wood has also appeared as a two page spread in JPG. Magazine. It has also had an odd trip of being echoed through the internet when Smashing Magazine posted 35 Fantastic HDR pictures.  This article echoed through the internet with thousands of re-postings.

 Recently I posted this as a comment on a blog when they were discussing the pluses and pitfalls of HDR (high dynamic range) photography.  Thankfully Mary Day Long the author of Mare Cognitum did enjoy my photograph and used it as an example of artful use of High Dynamic Range.  My comment is below:

Hi and thank you for your linking to my photo Foggy Wood. I imagine the trick in the HDR process is not to become too fascinated with how out of tune your photo can become. It is a temptation for many to push that envelope and end up with the results of what you speak. Really there is no substitute for good honest photography: composition, exposure, and the right aperture are all the factors you must get right. It is much like the old saying you can't make a silk purse out of a sow's ear. I think that applies. The trick if you want to call it that is the enhancement has to be subtle and not stray away far from what the original image offered. Its very easy to do, I have done it myself more times than I can count.


But when just the right amount of spice is applied you can and may end up with a very unique and beautiful image. Foggy Wood has become a very well liked image by many. I suppose there are some who would not like it. And that is fine with me. Ultimately I pleased myself and that to me was all that mattered. It will be coming out in a National Geographic Book titled 'Simply Beautiful Photographs' Oct 19th. And it went on display along with other photographs at the National Geographic Museum exhibit Sept 3rd.


The photo has taken an interesting journey and I have enjoyed watching it find a path of its own.

 It is indeed interesting to me how this photo continues to draw interest since I first published it on Flickr on March 2nd 2007. 

It appears that it may be an enduring image, one that I could never replicate, one that perhaps as Ansel Adams would had said "God pushed the shutter button".

Thursday, January 21, 2010

Ten Top Tips for Monochrome Photography


\


Monochrome photography plays to a certain audience who desire a certain look for their interior designs. In a sense it is photography in its purest form relying on a pleasing variations of tones.

In the digital age any color photo can be desaturated of its colors to render a black and white Show allphoto.

1. Almost all photo editing programs have the ability to convert a photo to black and white. It is generally as easy as clicking a button to desaturate an image. But once you achieve this does the image reflect what you desire?

2. And in many programs you have choices. You could choose sepia, bluish tints, straight black and white etc. The style you choose is up to you. And although it may seem like an easy conversion there are many things to consider.

3. In the above photo a slight hint of sepia has been blended in the layers. To reach the point that I found pleasing. I used the black and white adjustment filter in Photoshop and added a slight yellowish tint. I used restraint in the amount of color mainly because a deeper sepia tone would obsure detail that I had carefully brought out in the image.

4. In monochrome photography without a color pallet you depend on tonal contrast to make emphasis, and impact. Striking monochrome photography relies on drama to capture the audience.

5. In the above photo the penetrating stare by both the mother and the baby influenced my decision to capitalize on the drama of the scene. But drama can take many forms and it could be just the relationship of light and darkness that makes a photograph a good candidate to be a monochrome image.


6. In this photo the tonal contrasts between the light and dark elements of the photograph was my deciding factor on processing this photograph as black and white. To emphasis the drama my choice was not to add any tinting to the photo. I decided on the sharpness of the black and white to be the major elements of interest in the photo.


7. Sharpness is not always the deciding factor on choosing which photos to convert to monochrome. In this photo I chose to use the softness of the photo to draw on a sense of mystery. The blurring of the tonal contrast is what I think makes this photo pleasing. As well as effect of fog on the dappled light.


8. Sometimes less information can be more. This photograph in color would not have near the impact of a black and white image. The dramatic impulse of the deep black and whites was the deciding factors in converting this photo to black and white. The color version of this photo would have been completely unappealing.

9. My personal experience with black and white as opposed to color photography is that it appeals to a smaller audience. But, often the audience is more upscale in the prices that they will pay for good monochrome images. There is also a certain intrinsic reward in creating a beautiful image without the use of a large color palette.

10. I encourage you to experiment and not always think in terms of color. You may be passing up opportunities that you might just overlook if you do not look into black and white possibilities.